

Last updated on Mar 02, 2016 at 06:23 by Damien33
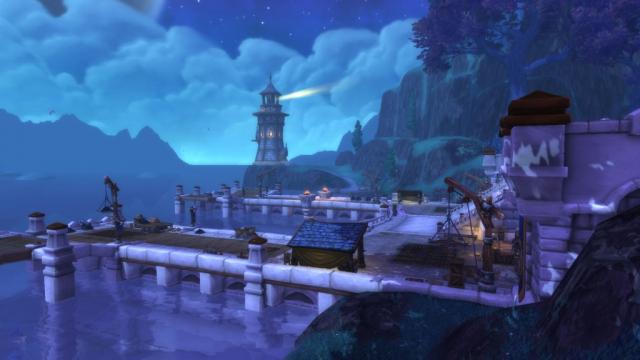
The Shipyard allows you to build ships and send them on Naval Missions in Patch 6.2.
Naval Missions take over the role of Follower Missions, in the sense that all the new Garrison rewards can only be obtained through Naval Missions:
Iron Fleet Treasure Chests, which contain Hellfire Citadel loot of appropriate item level for your character;
3 new Heirlooms: Captain Sander's Returned Band, Admiral Taylor's Loyalty Ring, Signet of the Third Fleet;
Left Shark, a pet;
Mudback Riverbeast, a mount;
Waterlogged Manifest, which starts a quest that leads to a Black-Market Auction House in your Garrison.
The Shipyard also has ties with the Legendary Rings quest line. One of the new 6.2 quests, Master vs. Commander, requires you to complete a series of Naval Missions to obtain a Draenic Sea Chart. We detail these missions in a section further down the page.
Naval Missions also allow you to get Abrogator Stones and Elemental Runes, so the Shipyard allows you to catch up to the current part of the Legendary Rings quest line faster, by providing you yet another means to obtain these items.
Tutorial
The quest line started by Garrison Campaign: War Council or Garrison Campaign: War Council, which introduces you to the content of Patch 6.2 (Tanaan Jungle, mostly), also serves as a tutorial for the Shipyard.
During the quest line, you will learn how to make ships and send them on missions. Simply make sure to take the follow-up Shipyard quest when you build your outpost in Tanaan: Shipyard Report or Shipyard Report.
After an hour of questing, you will have a functional Shipyard with 1 Transport ship, 1 Destroyer ship (of rare quality), 1 equipment unlocked (Blast Furnace), 1,130 Oil, and a few Rush Order: Shipyards. You will have also learned many things:
• there are several types of ships and Transport and Destroyer are just two types;
• ships cost Oil and Garrison Resources (see our Ships section for more details);
• ships can fail missions and get destroyed;
• ships have a chance to be upgraded from common to rare (and even sometimes epic!)
• when they are delivered to you (this conveniently happened to your second Destroyer during the tutorial);
• ships need 5,000 experience to upgrade to rare and 40,000 more to upgrade to epic;
• ships have 2 equipment slots that you can unlock, one when you level up the ship to rare quality and another one when you level up the ship to epic quality;
• when a ship levels up, its equipment slot is filled with equipment (normally, it is random, but for the sake of the tutorial, your Destroyer is equipped with Felsmoke Launcher when it upgrades upon delivery);
• equipment needs to be unlocked by first finding an equipment blueprint and then turning it to the Naval Equipment Specialist in your Garrison;
• equipment is needed to counter threats during naval missions;
• each type of ship counters a specific threat (Transport counters Land Objective and Destroyer Counters Submarine);
• when a quadrant is blocked, you need to complete the corresponding Blockade mission to unlock it.
• It is now time to build on that newfound knowledge and continue expanding your Shipyard, as we will see in the next s ection.
Getting Started After the Tutorial
Once the tutorial is over, you are left with 1 Transport, 1 Destroyer, and I Sunk Your Battleship / Upgrading the Fleet or I Sunk Your Battleship / Upgrading The Fleet.
You should complete both quests as soon as possible. I Sunk Your Battleship requires you to farm reputation with Hand of the Prophetor Vol'jin's Headhuntersto friendly in order to buy the blueprints for the Battleship, a ship that counters Destroyer. Upgrading the Fleet requires you to complete 15 Naval Missions and rewards you with a Level 2 Shipyard that can hold 8 ships (up from 6) and the blueprints for the Submarine, a ship that counters Carrier.
While you progress on these quests, we advise you to make a fleet of 4 Destroyers and 2 Transports and level them up as much as you can, all the while acquiring new equipment (see our Equipment sectionfor more details). Do not hesitate to decommission common quality ships and make new ones, hoping that they will turn rare or epic on delivery. Once you unlock the Shipyard Level 2 and obtain both the Battleship and the Submarine, we advise you to go for the following distribution of ships:
1 Transport;
3 Destroyers;
3 Battleships;
1 Submarine.
This means that you will need to destroy some of the ships you had previously made (by right-clicking them and decommissioning them). You will most likely unlock the Battleships before you upgrade the Shipyard to Level 2 and, in this case, you should destroy 1 Transport and 1 Destroyer and build 2 Battleships instead. We advise you to keep the ships with the crews that grant an additional success chance to missions, such as Human Crew, Pandaren Crew, or Undead Crew (see our Crews section for more details). The reason for that is that some missions requires you to counter Expert Captain, which can only be countered by crews or equipment that grant additional success chance. Until you reach epicquality on your ships, you want to avoid giving them equipment that grants success chance (equipment that counters threats are more important initially), which is why you need to get that from crews.
From there on, you simply need to keep upgrading your ships, get the equipment you are still missing, and complete Naval Domination or Naval Domination, the follow-up quest to Upgrading The Fleet. Completing that quest requires the completion of 25 Treasure Naval Missions, which can take 2 to 3 weeks, and rewards you with a Level 3 Shipyard that can hold 10 ships and the blueprints for the Carrier, a ship that counters Battleship.
Until you have a proper fleet, do not hesitate to change equipment on your ships on a regular basis, just to level them up faster and ensure your 100% success chance.
After that, your last goal will be to unlock The Awakener by reaching exalted reputation with the Order of the Awakened. This unique, special Destroyer can counter both Submarine and Battleship, thanks to its Arakkoa Crew.
Once you have unlocked your Shipyard Level 3 and the Awakener ship, we advise you to have the following distribution of ships:
1 Transport;
2 Destroyers (including one with a Murloc Crew);
3 Battleships;
2 Submarine;
1 Carrier;
The Awakener (count as both a Carrier and a Destroyer).
Getting Oil and Spending It
Oil is used solely to build ships (see our Ships section for costs) and to send your ships on missions.
Oil is mostly obtained through the daily Apexis Crystal quest in Tanaan Jungle and, in our experience, the 600 Oil per day that this quest provides is more than enough to cover all of your needs. You also get 600 Oil when you complete a Bonus Objective for the first time ever.
In addition, you can obtain a Blueprint: Oil Rig or Blueprint: Oil Rig when you reach revered reputation with Hand of the Prophet or Vol’jin’s Headhunters. This unlocks a daily Naval Mission that just requires 1 Transport ship and that rewards 200 Oil.
Finally, you can get a bit of extra Oil from mobs in Tanaan Jungle and from some of the Follower Missions introduced in Patch 6.2. Regarding these Follower Missions, it is worth noting that, at honored, the Hand of the Prophet and the Vol'jin's Headhunters reward you with a follower that increase your Oil gains from missions by 100%.
Ships
In the table below, you will find the list of ships, their cost and build time, and the threat(s) they counter. Each Naval Mission features basic threat(s), which can only be countered by selecting the appropriate ship(s).
Ship Counters Cost
Transport Land Objective 25 Garrison Resources
Destroyer Submarine 25 Garrison Resources
Submarine Carrier 50 Garrison Resources
Upgrading the Fleet
Battleship
Destroyer 100 Oil
50 Garrison Resources
60 minutes honored with Hand of the Prophet, honored with Vol'jin's Headhunters
Carrier
Battleship 200 Oil
50 Garrison Resources
120 minutes Naval Domination
The Awakener
Submarine
Battleship 200 Oil exalted with Order of the Awakened
Ships can be renamed and decommissioned by right-clicking them from the Fleet Command Table.
Equipment
Equipment comes in 3 different sorts, each of them providing a different type of buff to the ship they equip;
threat counters (for example, Felsmoke Launcher);
increased chance of success (for example, Extra Quarters);
miscellaneous buffs (for example, Nitro Fuel Tanks).
We advise you to prioritise unlocking the threat counters first, as they will be the most useful pieces of equipment early on. Once you have a fleet of epic ships, the other buffs will start becoming attractive.
In the sections that follow, we list all of the equipment you can obtain.
Threat Counters
The Threat Counters all need to be unlocked by bringing their blueprints to the Naval Equipment Specialist in your Shipyard. Once this is done, you can buy them from him for 500 Garrison Resources.
Bilge Pump Drops from Belgork in Tanaan Jungle (34.5 / 46.8)
Counters Stormy Weather
Blast Furnace Is obtained during Equipping Our Fleet or Equipping Our Fleet
Counters Swift
Felsmoke Launcher Drops from Felsmith Damorka in Tanaan Jungle (45.8 / 47.0) Counters First Strike
Ghostly Spyglass Drops from Captain Ironbeard.
Counters Cursed Crew
Gyroscopic Internal Stabilizer Drops from Iron Reaver in Hellfire Citadel. Counters Chaotic Whirlpools
High Intensity Fog Lights Drops from Xanzith the Everlasting in Tanaan Jungle (60.0 / 21.2) Counters Dense Fog
Ice Cutter Drops from Cindral the Wildfire in Tanaan Jungle (44.6 / 37.6)
Counters Icy Water
Trained Shark Tank Drops from Savage Whale Shark, who can be seen in Tanaan Jungle, around 70 / 24 or at Ironhold Harbor Counters Minelayer
True Iron Rudder Drops from Zoug the Heavy in Tanaan Jungle (37.0 / 32.8) Counters Evasive
Increased Chance of Success
All of the pieces of equipment in the table below grant an increased of success. They cannot be obtained through conventional means. Instead, when your ship gets upgraded (from common to rare and from rare to epic), it has a chance to have its new equipment slot filled with one of these pieces of equipment.
Equipment Description
Ammo Reserves Increases success chance when on a mission with a Battleship
Automated Skyscanner Increases success chance when on a mission with a Carrier
Extra Quarters Increases success chance when on a mission with a Transport
Q-43 Noisemaker Mines Increases success chance when on a mission with a Submarine
Sonic Amplification Field Increases success chance when on a mission with a Destroyer
Food Storage Bay Adds space for additional food stores, improving success chance on long missions
Salty Crew Grants a bonus to mission success chance
Miscellaneous
Equipment Blueprint Description
Tuskarr Fishing Net Requires honored reputation with Hand of the Prophet
Requires honored reputation with Vol'jin's Headhunters
Supplies fish when returning from a successful mission
Unsinkable Requires revered reputation with Hand of the Prophet
Requires revered reputation with Vol'jin's Headhunters
One-time cheat death for ships; equipment is destroyed when triggered
Nitro Fuel Tanks Unknown Reduces mission time by 50%
Wreckage Recovery Module Unknown Unknown
Tuskarr Fishing Net and Unsinkable can be acquired for 500 Garrison Resources from your Naval Equipment Specialist.
Crews
Each ship receives a random crew when you complete it, from amongst those listed below in descending order of usefulness.
Crew Description
Human Crew, Undead Crew Increases success chance on missions
Pandaren Crew Increases success chance on long missions
Draenic Crew Counters Dense Fog
Orc Crew Counters Icy Water
Murloc Crew Counters Land Objective
Night Elf Crew, Blood Elf Crew Reduces mission time by 50%
Worgen Crew, Tauren Crew Increases the experience gained from a mission for all ships by 50%
Gnomish Crew, Troll Crew Allows naval equipment to be recovered from successful missions; this may sound like an incredible perk, but from our testing, it only recovers equipment that has already been unlocked, which means that these crews only save you Garrison Resources.
Dwarven Crew, Goblin Crew Increases the gold gained from a mission by 100%
The Arakkoa Crew is exclusive to The Awakener, which is why it is not listed in the table.
Buffs
When completing missions whose icon is an 8-point compass rose, you receive a 1-day buff that is active only in one of the quadrants (not necessarily the one where you completed the mission, it appears).
Buff Mission Description
Apexis Storm Kraken the Whip Successful missions grant Apexis Crystals
Air Superiority The Neutralizer Increase success chance of missions
Captain Reania's Command It's Not a Gravy Boat... Increase mission experience by 50%
Captain Thokash's Command It's Not a Gravy Boat... Increase mission experience by 50%
Fearless Privateer A Convenient Truth Increase success chance of missions
Treasure Map Enterprising Solutions Increase gold gains from missions by 100%
Legendary Rings Missions
Two quests of the Legendary Rings quest linehave to do with your Shipyard: Command of the Seas and Master vs. Commander. While Command of the Seas is very straightforward and simply requires you to upgrade your Shipyard to Level 2, Master vs. Commander is much more involved.
Master vs. Commander requires you to turn in a Draenic Sea Chart. This item is obtained from the last of a series of Naval Missions of increasing difficulty:
Stalking the Master;
Giving Chase;
Ambush on the High Seas;
In Hot Pursuit;
Boarding the Master's Call.
Master vs. Commander is available as soon as you finish the tutorial, provided you are far enough in the Legendary Rings quest line. Each mission lasts 2 days, which means that you can get to In Hot Pursuitafter 6 days and to Boarding the Master's Call in 8 days, although you may not get to attempt the latter mission right away, because it requires a Carrier, which can take 2 to 3 weeks to unlock. These missions are difficult and require you to have unlocked equipment that grants an additional chance of success. Boarding the Master's Call is particularly difficult, because you will not only need proper equipment, but also crews that increase success chance: Human Crew, Undead Crew, and Pandaren Crew.
So, what we advise you to do is farm a few Medallion of the Legionand do your Tanaan Jungle daily quests, so you unlock Unsinkable as fast as possible, by reaching reveredreputation with Hand of the Prophetor Vol'jin's Headhunters. Equipping it on all your ships for In Hot Pursuit and Boarding the Master's Callmakes your success chance drops to respectively 97% and 85% (without using any increase success chance crew), but it guarantees that your ships survive if they fail.
Given the profile of the missions, you will want to unlock the following equipment:
True Iron Rudder;
Felsmoke Launcher;
Gyroscopic Internal Stabilizer;
Bilge Pump;
If you do not have Unsinkable for the last 2 missions, then you will also need:
Trained Shark Tank;
Ammo Reserves;
Q-43 Noisemaker Mines;
Automated Sky Scanner;
Sonic Amplification Field.
Finally, do not forget about Air Superiority and Fearless Privateer, the 1-day zone buff you can obtain from bonus missions.
Achievements
There are 22 achievements tied to the Shipyard. Most of them are related to completing Naval Missions.
Achievement Note
Set Sail! Construct a Shipyard
Naval Fleet Upgrade Shipyard to Level 2
Naval Armada Upgrade Shipyard to Level 3
Ironsides Upgrade a ship of every type to epic
Naval Mechanics Obtain all pieces of equipment
Naval Training Specialist Complete 10 Naval Training Missions
Naval Training Expert Complete 25 Naval Training Missions
Naval Siege Specialist Complete 10 Blockade Missions
Naval Siege Expert Complete 25 Blockade Missions
Naval Combat Expert Complete 25 Naval Combat Missions
Naval Combat Specialist Complete 50 Naval Combat Missions
Naval Treasure Specialist Complete 25 Naval Treasure Missions
Naval Treasure Expert Complete 50 Naval Treasure Missions
Naval Bonus Specialist Complete 10 Naval Bonus Missions (those that give buffs)
Naval Bonus Expert Complete 25 Naval Bonus Missions (those that give buffs)
Master of the Seas Complete the 10 achievements listed above; rewards the Captain Title
Seaman Complete 50 Naval Missions; rewards Admiral’s Compass, which is very useful for teleporting directly to the shipyard
Petty Officer Complete 100 Naval Missions; rewards Captain's Hat
Petty Officer Complete 100 Naval Missions; rewards Captain’s Hat
Fleet Commander Complete 500 Naval Missions
Fleet Commander Complete 500 Naval Missions
Admiral Complete 1,000 Naval Missions
Admiral Complete 1,000 Naval Missions
Charting a Course Complete 3 Rare Naval Missions; rewards Fleet Commander's Hat
Charting a Course Complete 3 Rare Naval Missions; rewards Fleet Commander's Hat
Exploring the High Seas Complete all 6 Rare Naval Missions
Exploring the High Seas Complete all 6 Rare Naval Missions

Garrison Shipyard: Complete Guide (WoD 6.2)
All rights for this guide belongs to Icyviens